
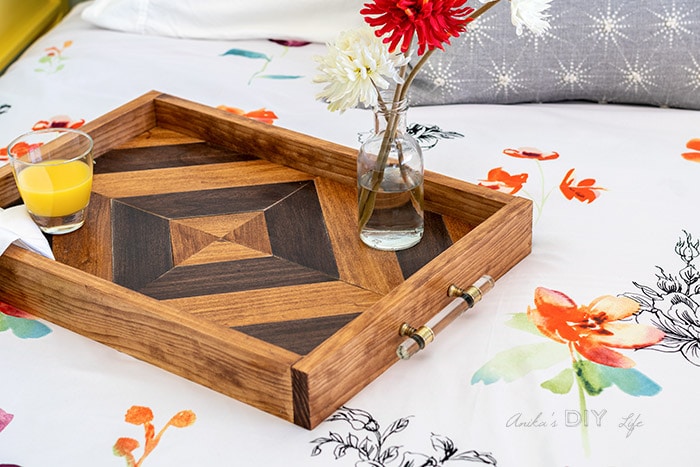
Learn how to make a gorgeous DIY wood tray using 3 basic power tools. It makes a great handmade woodworking gift for anyone. No fancy tools needed!
You will also like these Beginner Woodworking projects and easy scrap wood project ideas
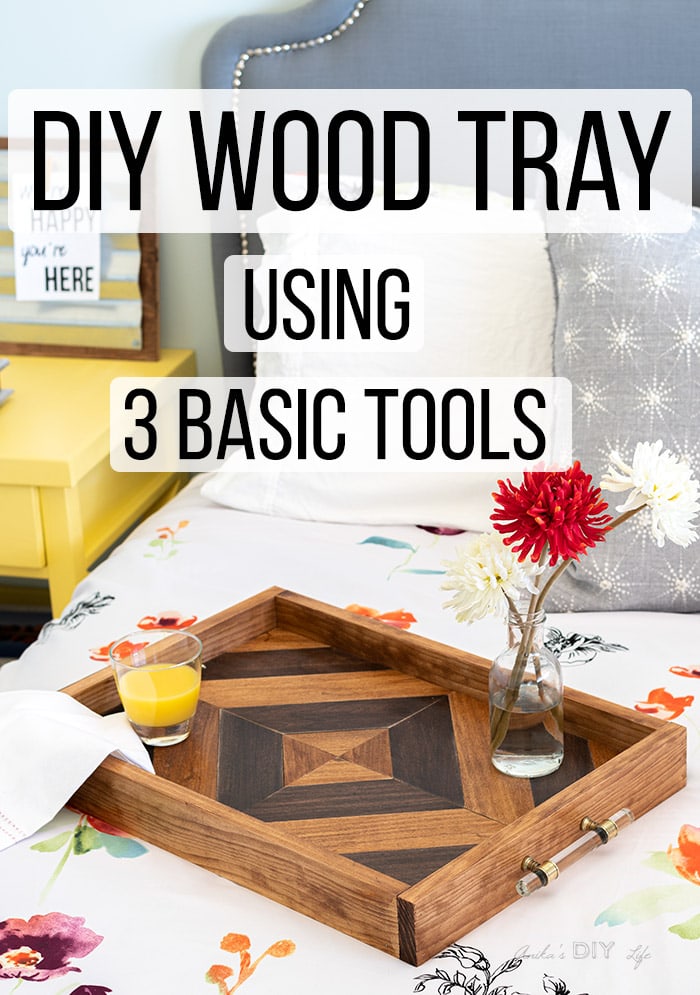
Have you seen all those fancy wood trays and cutting boards made using all the fancy tools like jointers and planers and thought to yourself… I wish I could make something like that but I don’t have the skills or tools to make these.
Well, today I am showing you how you can make this gorgeous tray without using any of those!
Follow me on Instagram @anikasdiylife to see all the behind the scenes and sneak peeks of my new projects
Basically, all you need are 3 tools for this DIY serving tray – a miter saw, a power drill and a nail gun.
Also, a Kreg Jig but that isn’t counted as a power tool right?
RELATED: Take a look at my list of 7 basic beginner woodworking tools!
This makes a great handmade gift!
Speaking of handmade gifts, I am teaming up with some very talented DIY bloggers to bring you even more DIY handmade gift ideas so be sure to check them out at the bottom of this post!
***This post is sponsored by Kreg Tool Company. Thank you for supporting the brands that make it possible to bring you fun projects***
DIY Wood Tray
Materials needed for making a DIY serving tray
- Lumber per the plans (a 1×8 board and ¼″ thick hobby boards)
- Kreg Jig – I used the new Kreg 320, but you can use any Kreg Jig. (See my full guide on how to use a Kreg Jig for beginners)
- Miter Saw
- 1-¼″ pocket hole screws
- Power Drill
- Brad nailer
- 1¼” brad nails
- Wood Glue
- Face clamps
- Kreg hardware jig
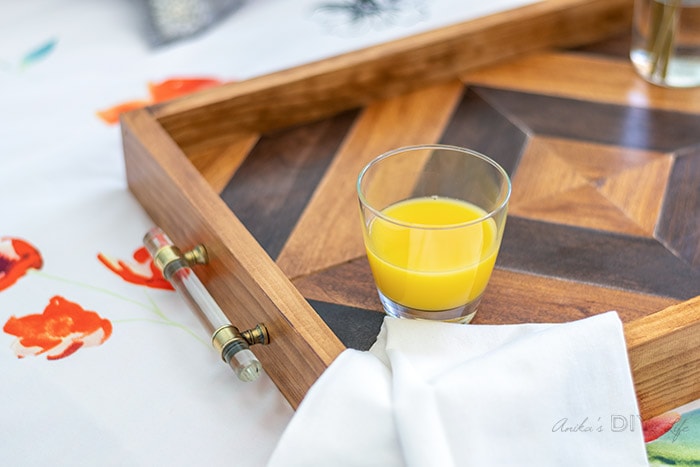
- Stain or paint of your choice. I used Gel stain in Nutmeg and Java.
- Topcoat of choice – I used this one.
- Hardware of choice.
Before we get started, make sure to follow me on Instagram, YouTube, and Pinterest to keep up with all my latest builds and projects!
DIY Wooden Tray Plans
I am sharing the step by step plans over at BuildSomething.com
Click here to head over to the plans.
Building a wood serving tray
Here is a full video of how I built the table. The step by step instructions follow.
Click here to subscribe to my YouTube Channel for more great videos!
How to make a wooden tray
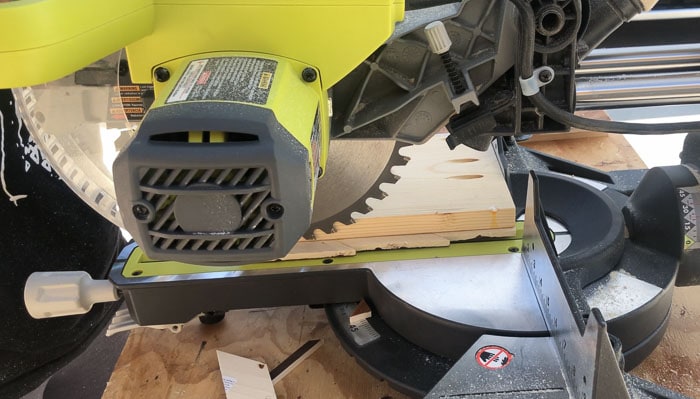
Step 1: Cut base panels
I cut the base panels out of 1×8 boards. I wanted 4 panels to be able to make a pattern with the poplar hobby boards.
Tip – It is important that these boards be perfectly equal in size. Set up a stop clock to cut them all to equal length.
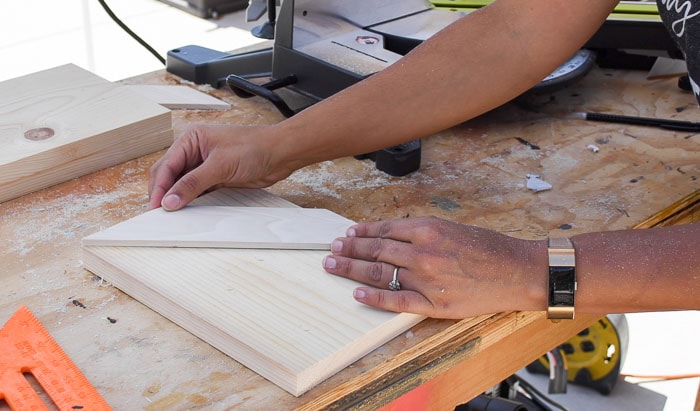
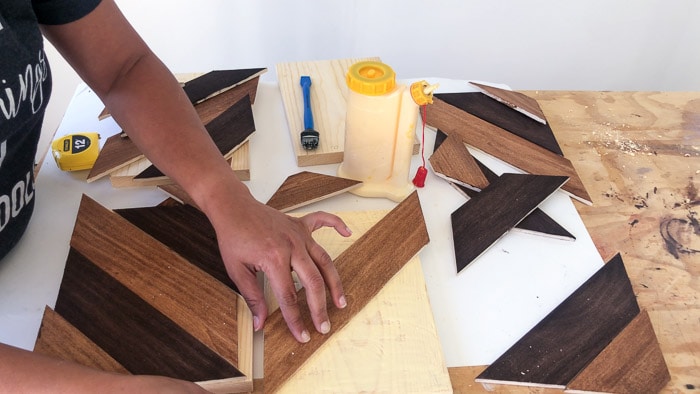
Step 2: Cut top strips
Set the miter saw at 45 degrees and cut the ¼″ hobby boards to size.
I needed 5 pieces to cover each panel.
Once they are cut, be sure to sand them smooth and also mark the location of each board on the base panel.
Step 3: Stain boards
Stain (or paint) the boards in the colors of your choice. I used Gel stain in Java and Nutmeg. This seems to be my new favorite combination 🙂
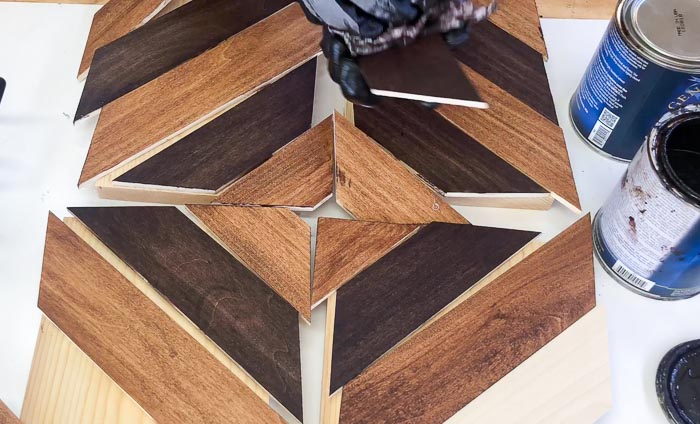
I used poplar but you can also use a wood species that is food safe and finish with food grade oil. See more information here.
Step 4: Make pocket holes
Make pocket holes with the Kreg Jig on the ¾″ setting on the backside of the panels.
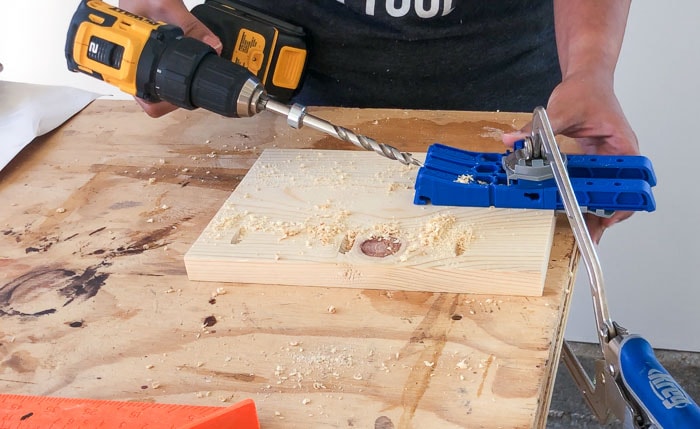
You don’t need them on all of them. Just one set on every joint.
Step 5: Attach boards
Attach the top boards using wood glue.
You could use finish nails if you like but I didn’t want the finish nails to show on the top. So I just weighed them down with heavy cans of paint and joint compound and let them dry overnight.
Step 6: Build a tray base
Cut off any overhangs on the miter saw. Be sure to align the saw carefully so as to not cut off any of the base panels.
Layout the base panels and attach them using wood glue and 1-¼″ pocket hole screws.

Tip – A face clamp near the pocket hole helps make sure the panels stay flush and even as you attach them.
Step 7: Attach sides
Cut, Stain and attach 1×3 boards to the sides of the tray using wood glue and finish nails.
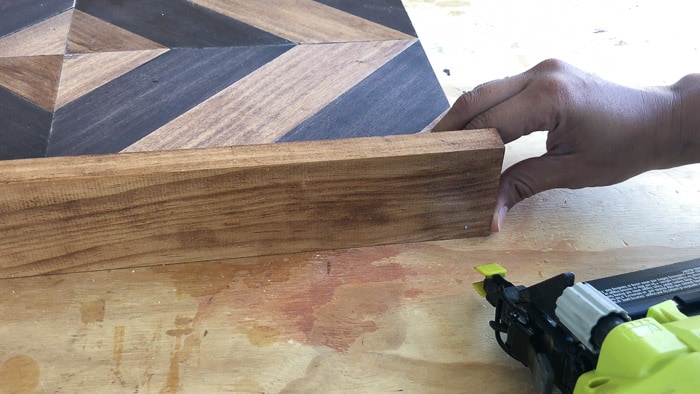
Want a more finished look for the wood tray?
Cut the sides at 45-degree miters and attach.
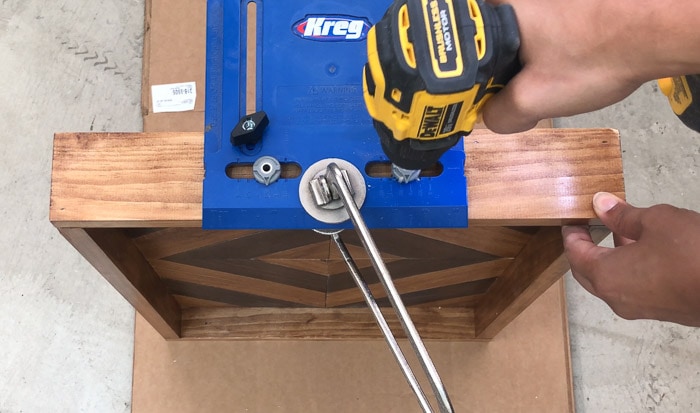
Step 8: Apply finish and add hardware
- Apply the finish of your choice. I used this one.
- To add hardware, I used the Kreg hardware jig and predrilled holes before attaching handles.
That is it!
A pretty handmade wooden serving tray using basic tools and beginner skills.
Don’t forget to get the plans for the tray on BuildSomething.com
If you decide to build it, I’d love to see it! Feel free to email photos to me at [email protected] or tag me on Instagram @anikasdiylife for a chance to be featured on social media!
More DIY Gift Ideas
And now, here are some awesome DIY gift ideas from some of my favorite bloggers –
- DIY Wooden Headset Stand by Katie @ Addicted 2 DIY
- House Advent Calendar by Cristina @ Remodelando La Casa
- DIY Handmade Wood Gift Box by Jaime @ Jaime Costiglio
- Easy Concrete Planter by Sam @ DIY Huntress
- DIY Step Stool by Mindi @ My Love 2 Create
- Tree Branch Log Projects by Gail @ My Repurposed Life
- Charging Station by Shelly @ 100 Things To Do
- Wood Cake Stand by Angie @ House Becoming Home
- Hanging macrame tutorial by Bethany @ Reality Daydream
- DIY Desk Planter and Business Card Holder by Sarah @ Ugly Duckling House
More easy beginner project ideas –
- DIY Mail organizer without power tools
- DIY Spice bottle organizer or craft paint organizer
- DIY footrest for under the desk
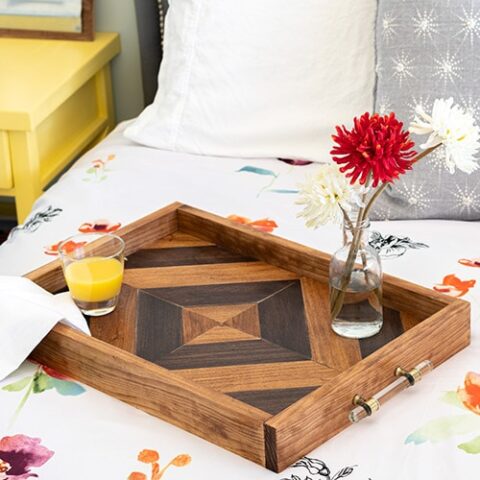
DIY Wood Tray Using Only 3 Tools
How to make a gorgeous DIY wood tray using 3 basic power tools. It makes a great handmade woodworking gift for anyone. No fancy tools needed!
Materials
- Lumber per the plans (a 1x8 board and ¼" thick hobby boards)
- 1-¼″ pocket hole screws
- 1¼” brad nails
- Wood Glue
- Stain or paint of your choice
- Topcoat of choice
- Hardware of choice.
Instructions
- Cut base panels. I cut the base panels out of 1x8 boards. I wanted 4 panels to be able to make a pattern with the poplar hobby boards.
- Set the miter saw at 45 degrees and cut the ¼" hobby boards to size. I needed 5 pieces to cover each panel.
- Once they are cut, be sure to sand them smooth and also mark the location of each board on the base panel.
- Stain (or paint) the boards in the colors of your choice. I used Gel stain in Java and Nutmeg.
- Make pocket holes with the Kreg Jig on the ¾" setting on the backside of the panels. You don't need them on all of them. Just one set on every joint.
- Attach the top boards using wood glue. You could use finish nails if you like but I didn't want the finish nails to show on the top. So I just weighed them down with heavy cans of paint and joint compound and let them dry overnight.
- Build a tray base. Cut off any overhangs on the miter saw. Be sure to align the saw carefully so as to not cut off any of the base panels.
- Layout the base panels and attach them using wood glue and 1-¼" pocket hole screws.
- Attach sides. Cut, Stain and attach 1x3 boards to the sides of the tray using wood glue and finish nails.
- Want a more finished look for the wood tray? Cut the sides at 45-degree miters and attach.
- Apply the finish of your choice. I used this one.
- To add hardware, I used the Kreg hardware jig and predrilled holes before attaching handles. That's it!
Lexie H
I like this, great item for upcoming Christmas/Holiday gifts!
gail
Awesome video Anika! I love, love, love your tray. The two toned stain colors are perfect! 🙂
pinning!
gail
ps I love that Kreg hardware jig.
Katie
Your tray looks so beautiful, Anika! I love the pattern you made with the wood and it makes a perfect gift idea!
Cara
Anika, I love this tray! Of all the projects I have done, I somehow have never made a tray! Lol! This may just be the first one I have to make! Love it!
Mindi
This is just so beautiful, love the different wood stains, and I am a sucker for trays!