
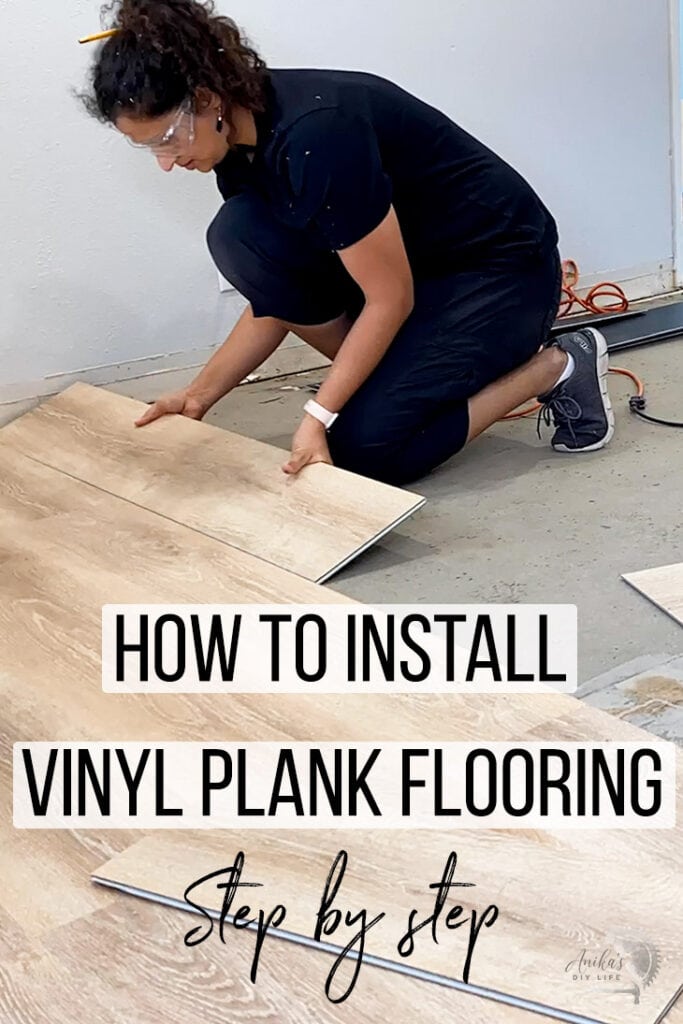
Installing vinyl plank flooring is an easy beginner-friendly project. Get all the details of how to prep the floor and install step-by-step!
We needed to install new flooring in our kitchen/entryway/staircase area. It needed to be durable, waterproof, and easy to maintain.
We did have vinyl plank flooring in these areas previously but it was very poor quality – you could see it ripple and was starting to pop up in various areas – becoming a trip hazard very fast. During the demo, we found that the underlayment in the area with problems was very flimsy and there was a threshold screwed into it and both of these could be the reason for the problems.
***This project is sponsored by The Home Depot. Thank you for supporting the brands that make it possible to bring you new projects***
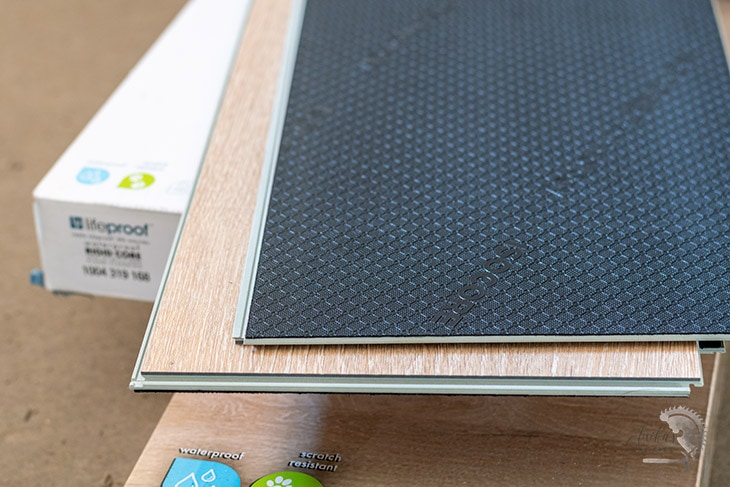
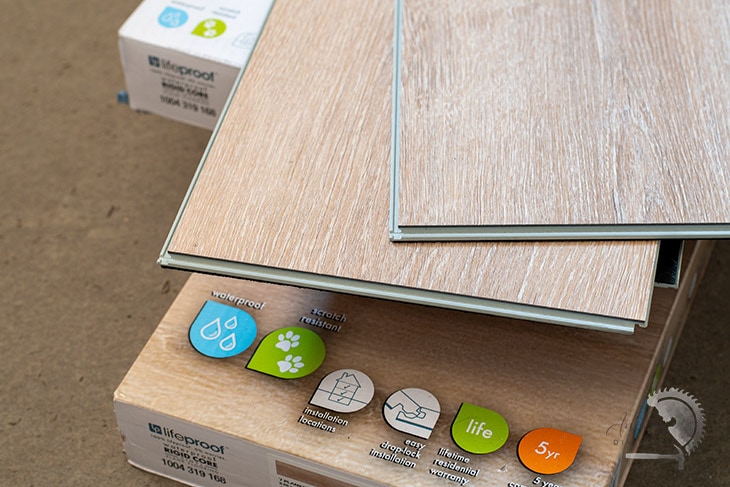
For the new floor, we did a lot of research and ultimately decided to go with LifeProof Vinyl Plank Flooring that is exclusively available at The Home Depot.
Why we chose LifeProof Vinyl Plank Flooring
To be honest, when we first started researching replacement flooring options, we were trying to find an alternative to vinyl flooring because of our experience with the previous floor. After chatting with multiple flooring experts, we decided on LifeProof Vinyl Plank Flooring!
Here’s why:
- It has an inner rigid core
- It has a pre-attached underlayment making it not only easy-to-install but also quiet
- The low-gloss sheen gave it a very realistic wood texture and feel.
- And of course, it is waterproof and durable making it an excellent choice for the areas we were considering – kitchen and entryway.
This was the first time we were tackling a flooring project and once we got a hang of it, it was so much easier to install than I had expected and I’m going to show you exactly how to prep for it and lay it down.
How to prepare the floor for vinyl plank flooring
The great thing about vinyl plank flooring is that it can be installed over vinyl, tile or hardwood. The manufacturer instructions that come with the flooring in every box are very detailed and an excellent reference point. Here are the major things we did:
- Remove any uneven old vinyl
- Make sure the floor is level within a quarter inch. If it is not, you need to level it with a floor patch or similar floor leveling compound.
- Fill any large dents or grooves deeper than a quarter inch with a floor patch
- Check for and push in any nails sticking out of the subfloor.
- Remove baseboards and label them for re-use. Alternatively, you can leave the baseboards in place and later add shoe-molding to cover the gap between the new floor and wall.
- IMPORTANT – Vinyl plank flooring is a floating floor and needs to be able to move around with contraction and expansion and cannot have any immovable permanent fixtures on it. If you intend to add any new cabinets or built-ins in the room you need to do that before you install the flooring. (We added new cabinets for our kitchen)
Tools to install vinyl plank flooring
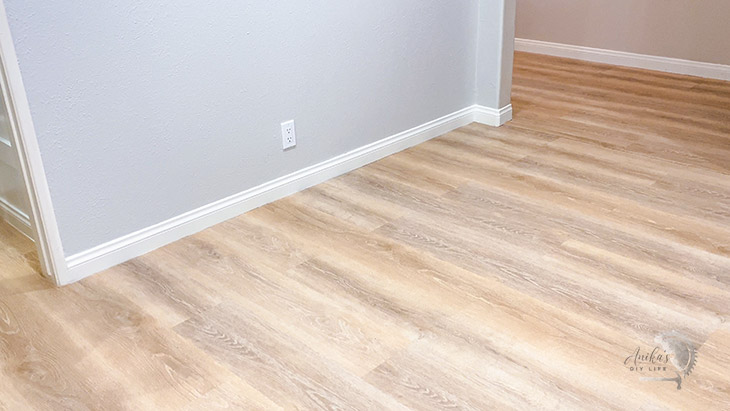
- LifeProof Vinyl Plank Flooring in the color of your choice. We picked Dusk Cherry because we loved the light beige with gray undertones and the variations in the pattern.
- Matching Reducer or T-mold (as needed).
- Matching Stair nose (if installing on the staircase)
- Quarter Round – for around cabinets (match to flooring or get pre-primed)
- Flooring installation kit (includes spacers, tapping block, S-bar, and a mallet)
- Shop Vacuum
- A way to cut the planks
- Utility knife/ miter saw
- Table saw
- Jigsaw/ hand saw
- Oscillating multitool (or a flush-cut handsaw)
- Construction adhesive (for staircase install)
- Pin nailer (for staircase install)
How much flooring to order
When ordering flooring be sure to order 10 to 15% extra over what your square footage is to account for the waste. There will be cut-offs at the ends, but you might damage boards or you might make a wrong cut – you don’t want to run out of flooring in the middle of your project.
Planning the floor layout
Before beginning the install, there are a few things you need to do to make sure the install goes smoothly:
Which direction to install vinyl plank flooring
Typically, it is suggested to go parallel to the longest wall but it is not necessary. In our case, since it was in the kitchen, we decided to run it parallel to the cabinets for symmetry. Once you decide the direction of the planks, stand looking at the largest wall from which the planks will come towards you. You want to start at the left corner of that wall. To make it even clearer – when you install a plank – the tongue of the long side and the groove of the short side should go towards the wall.
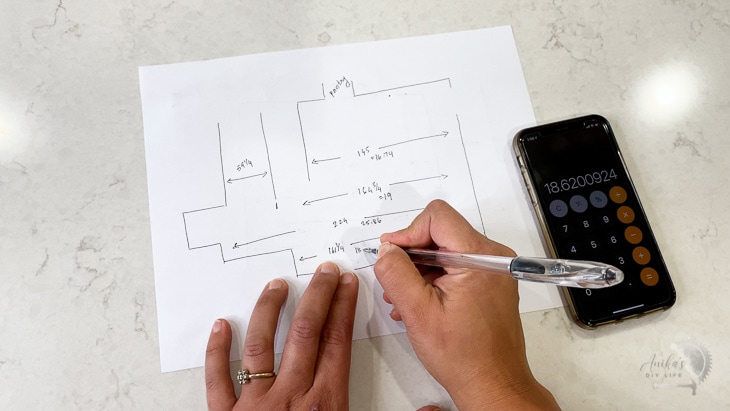
Measure and map out the area
This would be really simple for a rectangular room but our area included an entryway dining space kitchen area and a little pantry so it was a bit complicated. Make sure to measure every single edge-to-edge dimension.
Width of first and last row
Divide the width of the room by the width of the plank to make sure you don’t end up with skinny planks in the last row. If you end up with a plank that is less than half-width, you can split the difference and accommodate for it in the first row.
First and last plank in each row
It needs to be at least 8″ long AND the seams need to be staggered by at least 8″ in adjoining rows. So be sure to calculate for that and adjust before you begin each row.
How to install vinyl plank flooring
LifeProof Vinyl Plank Flooring has a click-lock system which makes it super easy to install.
Transitions
If you will have transitions between the new vinyl floor and any existing floor or carpet, you will need appropriate reducers. Cut and install the metal strips that come with the reducer before beginning. At the end of the project, you can simply click the reducers into these metal strips.
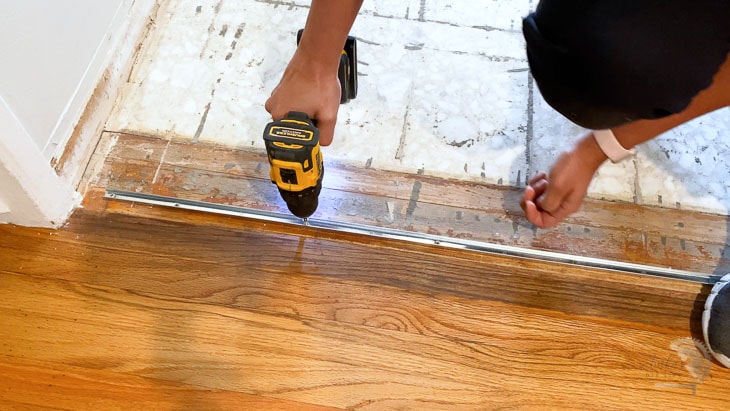
If you have up to a quarter-inch step between areas you can use a T-molding. We had old tile in one area and old vinyl in the other and the height difference was too much for the vinyl plank flooring to install across but not enough for a reducer. This was a good candidate for the T-molding.
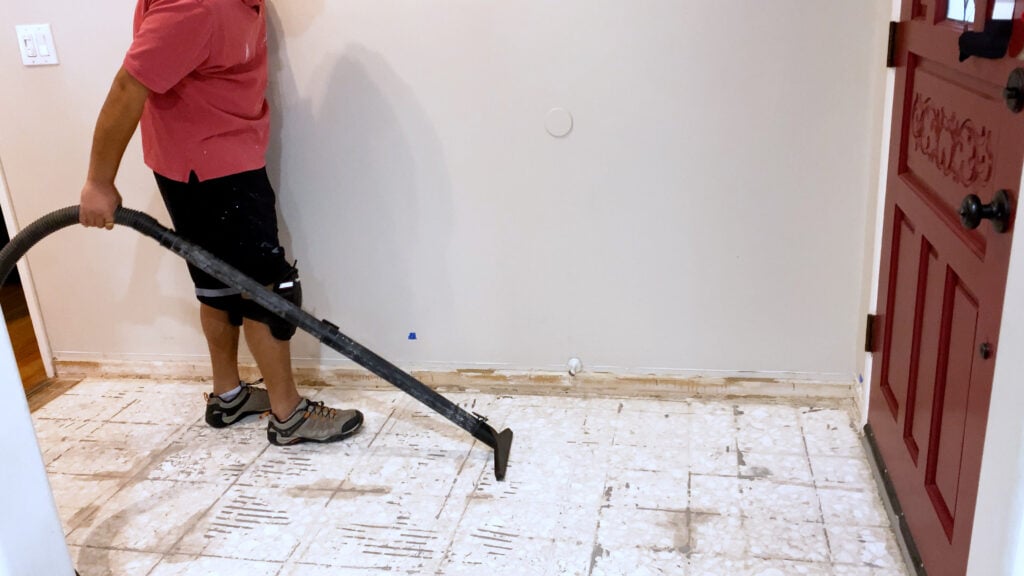
Clean up
Before installing, thoroughly vacuum the area where you will be installing the flooring with a shop vacuum to get rid of any debris. Any debris getting stuck under the plank or in the locking system will only cause problems during the install.
Cutting vinyl plank flooring
There are many ways to cut vinyl plank flooring.
- Using a utility knife – you can simply score the front of the plank with a utility knife a couple of times and snap the board. Be careful to keep the knife at the same location as you score.
- Using power saws – you can use a miter saw to crosscut and a table saw to rip the boards. The dust from cutting the vinyl boards is pretty nasty, so make sure to do it outdoors or with a good quality dust extraction system.
- Using a Jigsaw or hand saw – if you need to cut shapes to go around cabinets or walls, use a jigsaw or a handsaw to cut it out. Be sure to use a general-purpose blade in the jigsaw. Learn how to use a jigsaw here.
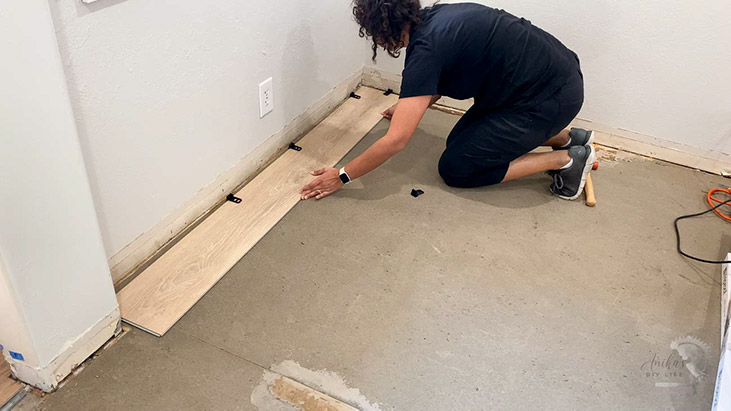
Installing the first row
- Cut out and remove the tongue part of the planks using a utility knife. This is the side that will be facing the wall.
- Snap the short edges of the planks together with a few taps of a mallet.
- Once the row is ready, push it to the wall using quarter inch spacers between the wall and the planks.
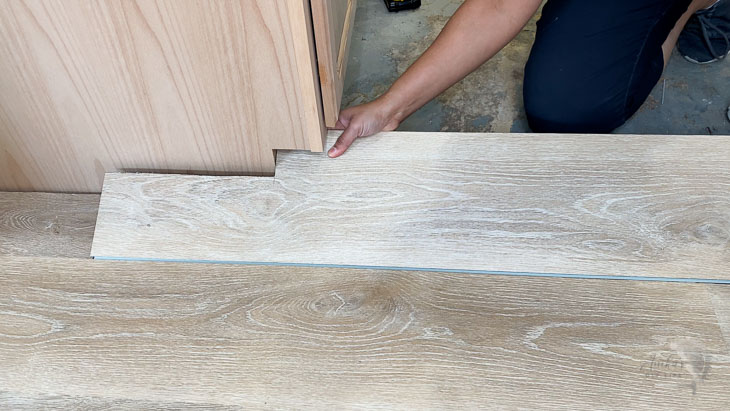
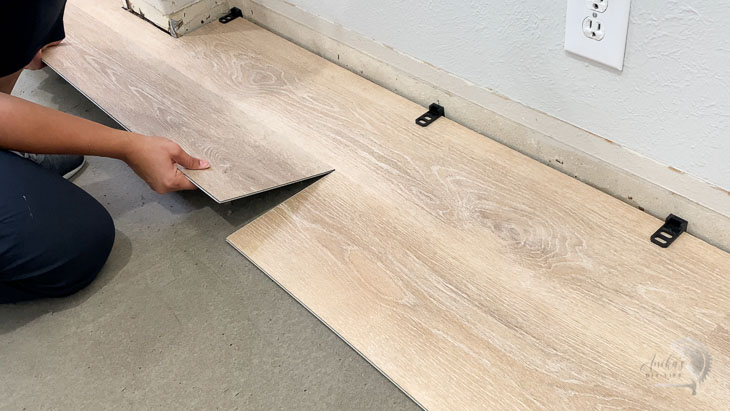
Installing the second row
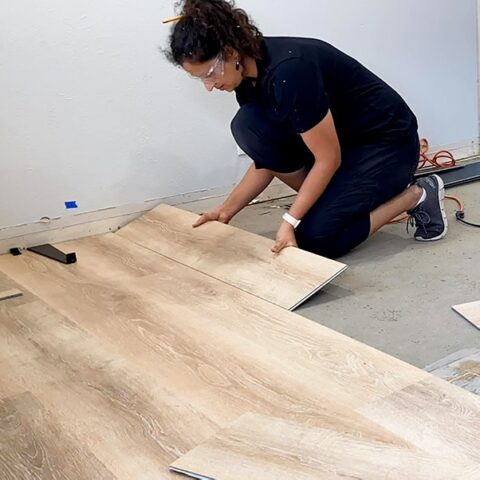
- The first plank of the second row is a pretty straightforward – just hook it onto the previous row and snap into place using the tapping block from the installation kit.
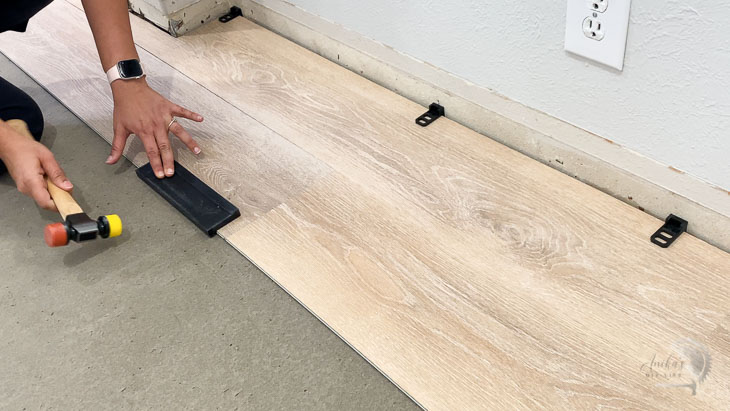
- For the next plank – hook it onto the long edge at 45 degrees. Gently push it over towards the previous plank and drop it down. You should be able to push it together with your fingers and follow with a few taps of a mallet on the short side to make them snug.
- Hook the plastic tapping block from the installation kit on the side and tap it to push the edges together until they are all snug.
Then just repeat the process again and again and again.
You can use the cutoffs from the end of one row to start the next row to minimize wastage.
Installing near door jambs
The flooring should be laid under the door jamb for a clean look since it cannot cover it with trim. Flush-cut the jamb using a scrap piece of the vinyl plank as a guide and using an oscillating multi-tool or handheld flush cut saw.

How to install last row
For planks at the very end where you may not have enough space to use the tapping block, the installation kit comes with an S-shaped bar that can be used to pull the planks together.
How to install vinyl plank flooring on stairs
Installing vinyl plank flooring on stairs is pretty straightforward.
- Cut a plank to fit on the stair riser (if using). I did not do this.
- Cut the plank and stair nose to fit the step. The plank would need to be ripped down to be accommodated behind the stair nose. This can be done on a table saw or with a hand saw. Make sure it is a snug fit.
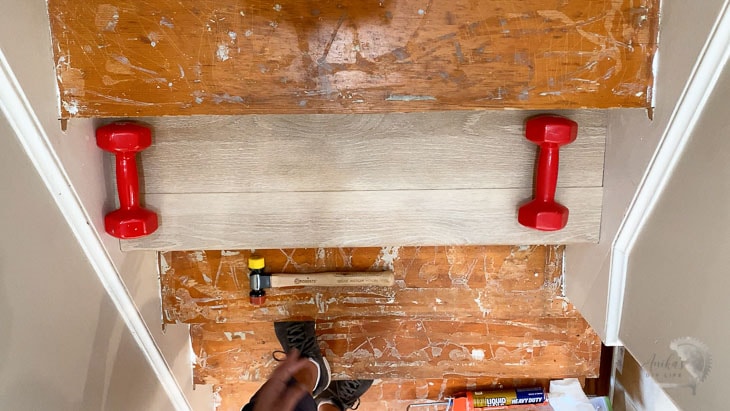
- Apply a construction adhesive to attach the stair riser (if applicable), the plank, and the stair nose and push it in place.
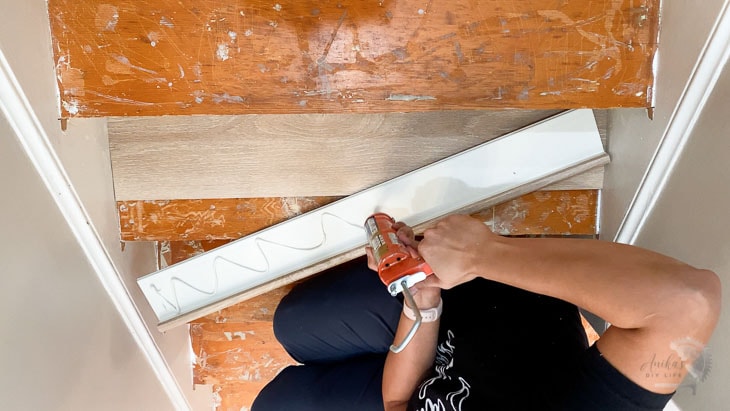
- Add a few pin nails to hold it in place and apply weight.
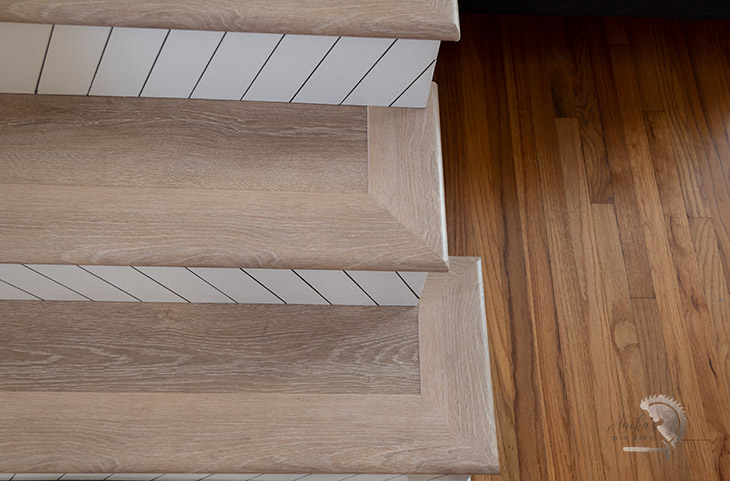
Installing stair noses on open corners
On stairs with open corners, cut the stair noses at 45-degrees and wrap them around for a clean finished look.
Important tips for installing
- Be sure to vacuum between each and every plank – especially when you have cut the plank to get rid of any debris.
- It is just a few taps for each plank. In fact, if you have to use any amount of excessive force, you are probably doing it wrong and no matter how much you pound it, it will never work.
- If the planks are not sitting snug, inspect the plank and the locking mechanism for debris and clean it out.
- Be careful holding the plastic block while tapping, if the block or mallet slips you can damage the locking mechanism of the board.
- As you are laying down the flooring, be sure to mix up boxes so that the colors and patterns and shades are well mixed up throughout the room.
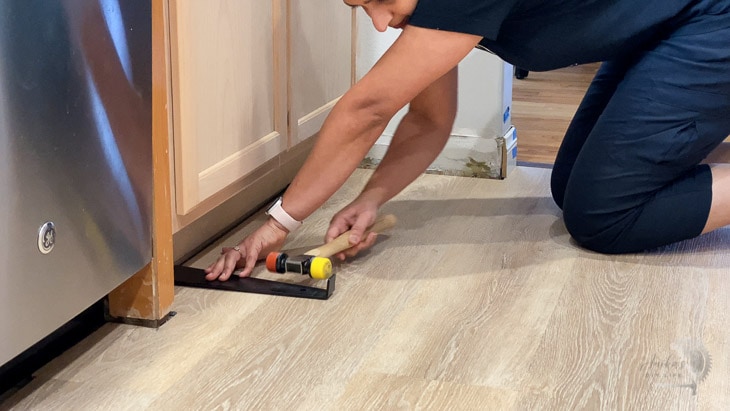
- Remember to leave the quarter-inch spacing around all edges – like cabinets. These will get covered by the quarter round.
How long does it take to install
The answer to that will obviously depend on the area you have to cover and how many complicated cuts are involved. We had about 500 sq ft including stair noses with lots of corners and cutouts for the cabinets and it took my husband and me two full 8-hour days plus another 3-hour day to lay down all the flooring including the staircase (not including the demo).
Finishing touches
- Once the flooring is installed, re-install the baseboards, caulk, and paint them. Be careful to not drive nails into the flooring. If you had decided not to remove the baseboards, you can cover up the gap using base shoe molding.
- Add a quarter round trim around the cabinets to cover up the gaps. You can either install quarter-round to match the flooring, or you can install pre-primed quarter round and paint to match the cabinets.
- Install the reducers and transitions as needed. These simply click into the metal strip that was previously installed and can be gently tapped in with a mallet.
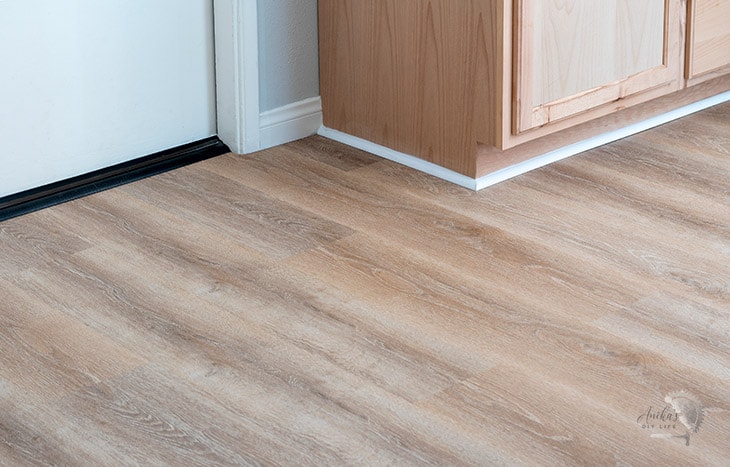
The flooring went down smoothly and I am so glad we did it ourselves. The new floors are nice and bright, feel awesome under the feet and are durable. Plus the install was super easy with the click to lock solution.
I think Life Proof Vinyl Plank Flooring from The Home Depot is a great option for a beginner DIY flooring install to get your hands dirty and save a couple thousand dollars in the process.
Be sure to check out more about LifeProof Vinyl Plank Flooring at The Home Depot. They have a huge range of DIY-friendly flooring options.
Check out all the projects in my kitchen remodel here.
Installing Vinyl Plank Flooring - For Beginners
Installing vinyl plank flooring is an easy beginner-friendly project. Get all the details of how to prep the floor and install step by step!
Materials
Tools
- Shop Vacuum
- Utility knife
- Table saw or jigsaw
- Oscillating multitool
- Pin nailer
Instructions
- Order flooring. Be sure to add an extra 10%-15% to allow for mistakes and cut-offs
- Decide which way direction you will lay the floor.
- Measure and map the area.
- Figure out the width of the first and last row.
- Cut and install metal strips that come with the reducer for transitions before laying any flooring.
- Before installing, thoroughly vacuum the area where you will be installing the flooring with a shop vacuum to get rid of any debris.
- Install the first row by cutting out and removing the tongue part of the planks with a utility knife. Once the row is ready, push it to the wall using quarter inch spacers between the wall and the planks.
- Install the second row by hooking the first plank onto the the previous row and snap into place using the tapping block from the installation kit. For the next plank, hook it onto the long edge at 45 degrees. Gently push it over towards the previous plank and drop it down. Then repeat until all the flooring is laid.
- Pull the last row in line using the S-bar in the installation kit.
- Re-install baseboards, caulk and paint them.
- Install reducers and transitions as needed into the metal strip that was previously installed.
Installing vinyl plank flooring on stairs
- Cut a plank to fit on the stair riser (if using). I did not do this.
- Cut the plank and stair nose to fit the step. The plank would need to be ripped down to be accommodated behind the stair nose. This can be done on a table saw or with a hand saw. Make sure it is a snug fit.
- Apply a construction adhesive to attach the stair riser (if applicable), the plank, and the stair nose and push it in place. Add a few pin nails to hold in place and apply weight.
- On stairs with open corners, cut the stair noses at 45-degrees and wrap them around for a clean finished look.
Linda Weeks
My golly, Anika! This is a real project! And your family still likes you? My husband would have been fit to be tied if I had enlisted him to help me with this much work! Bless you! I know you saved a lot of $$ doing it yourselves! Good thing you’re as young and healthy as you are, I have a few years on you – ! I admire your son being so good as to pitch in like that too, he must be a good son!
Good luck with the balance of your project!